How to Use SOL-1
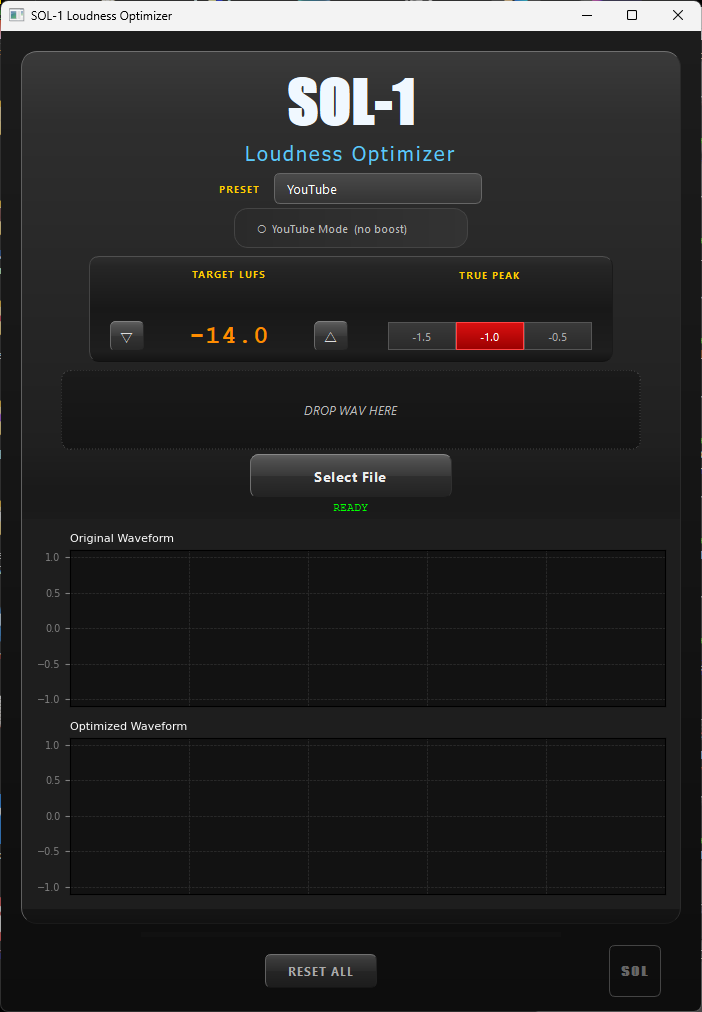
When you launch the app, the default preset is set to YouTube. — 🆕 Updated! Now features YouTube Mode (no boost) and displays output LUFS & True Peak after processing.
🆕 New! YouTube Mode (no boost)
The toggle switch below the PRESET selector enables YouTube Mode. When ON, any file that is already quieter than the target LUFS — meaning it would require a boost — is skipped automatically. A popup displays the measured LUFS and True Peak so you can still review the analysis, but no processing is applied and the original file is left unchanged.
This is useful when you want to avoid boosting quieter material, such as ambient tracks or intentionally low-level recordings that don’t need to match -14 LUFS exactly.
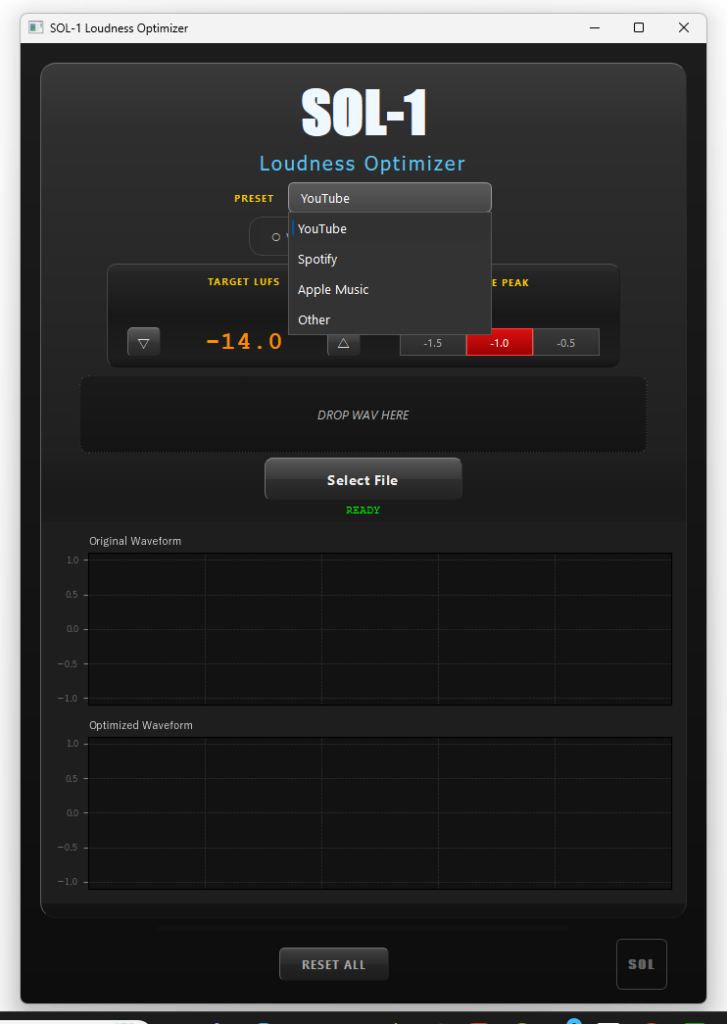
The interface is as simple as it gets. Start by selecting a preset at the top. Available presets are YouTube, Spotify, Apple Music, and Other.
Once you’ve selected a preset, drag and drop a WAV file onto the DROP WAV HERE area, or click Select File. SOL-1 will begin analyzing the file — the progress bar at the bottom will move. Analysis typically takes around 10 seconds for a standard track, after which the results are shown in a popup.

In the example shown, the measured loudness is -11.39 LUFS with a True Peak of -1.10 dBTP. SOL-1 indicates that it will apply -2.61 dB of gain to reach the YouTube target of -14 LUFS. If you just wanted the measurement, click Cancel. If you want to proceed with optimization, click Start. That’s it.
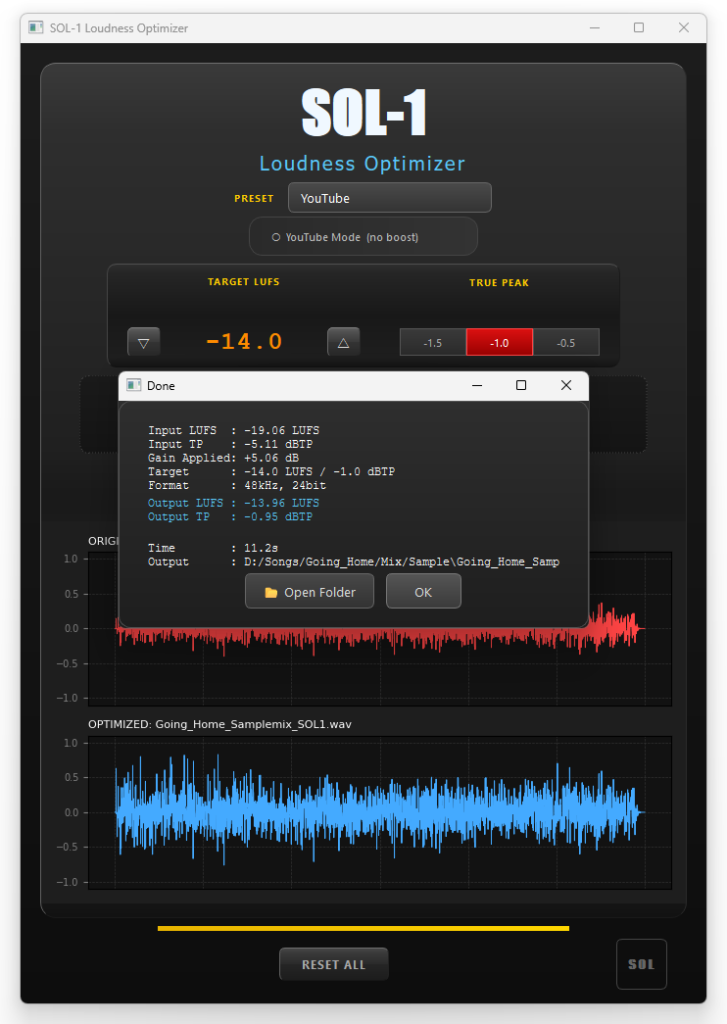
When processing is complete, a results popup appears showing the input LUFS, True Peak, gain applied, and — new in this version — the measured Output LUFS and True Peak of the processed file. The original file is never modified. The optimized file is saved in the same folder as the source, with “_SOL1” appended to the filename. The output file preserves the original sample rate and bit depth — in the example above, 48 kHz, 24-bit.
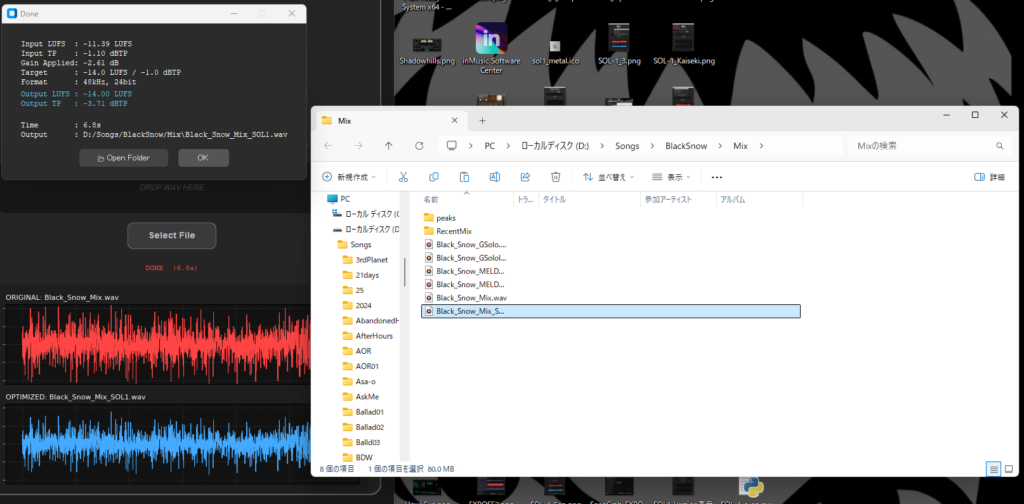
Click Open Folder to open the output location with the file already selected. The original file will appear directly above it in the folder, making it easy to compare the two side by side. This means SOL-1 also works as a preview tool — you can hear exactly how your track will sound on YouTube before uploading.
To process another file, click RESET ALL at the bottom to return to the default state.
The entire workflow — from file selection to optimized output — takes under a minute for a typical 4–5 minute track.
Results
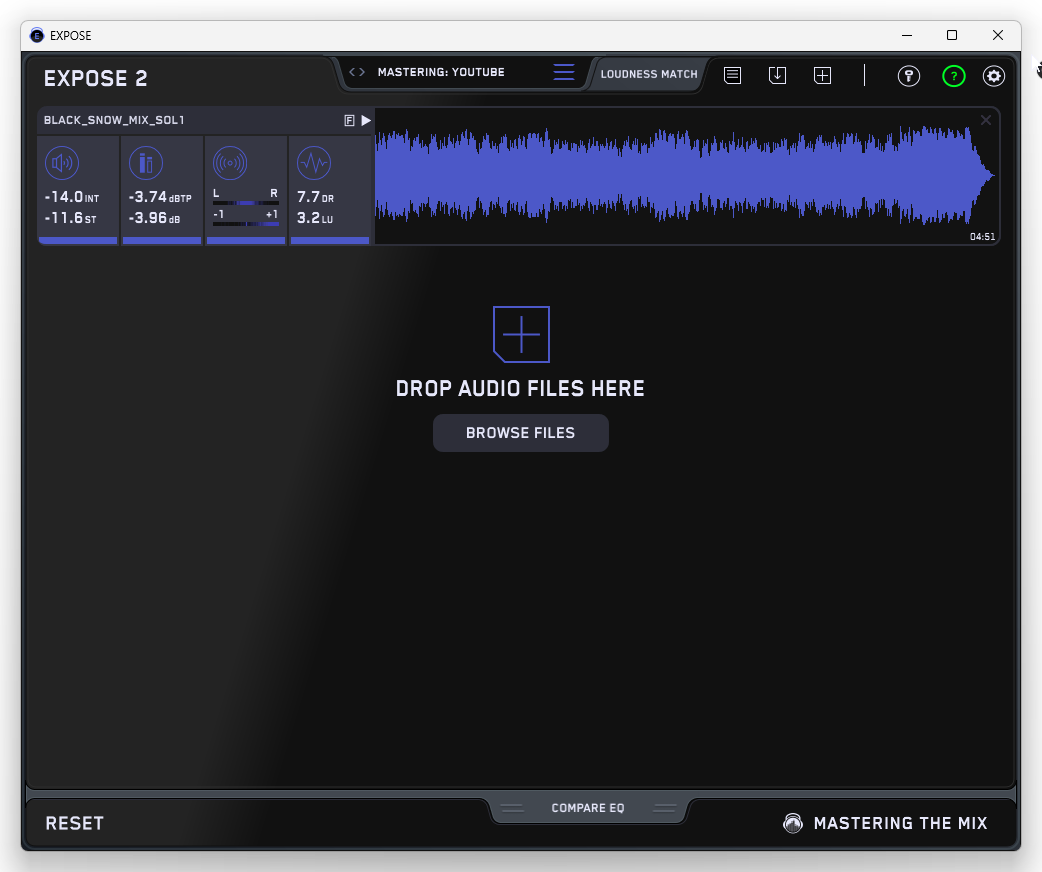
The optimized files were verified using EXPOSE 2, a professional loudness analysis tool. As shown, all files measure cleanly at -14 LUFS. Files where the True Peak was already below -1 dBTP were left untouched at their original peak level, preserving the original dynamic balance.
Summary
SOL-1 is the ideal tool for anyone who isn’t sure what LUFS, loudness normalization, or True Peak means — and just needs their audio to sound right on YouTube. The interface requires zero learning curve.
When optimizing, SOL-1 does not force the True Peak to -1 dBTP if the source is already below that level. Tracks louder than -14 LUFS are brought down; tracks quieter than -14 LUFS are boosted to match. If you prefer to leave quiet tracks untouched, enable YouTube Mode (no boost) — files below the target LUFS will be skipped automatically. Note that YouTube’s own normalization only lowers volume — it does not boost quiet tracks. SOL-1 solves that problem. All processing is ITU-R BS.1770-4 compliant, ensuring accuracy and audio quality.
SOL-1 Loudness Optimizer for Windows is available on Gumroad. Check the link below.